

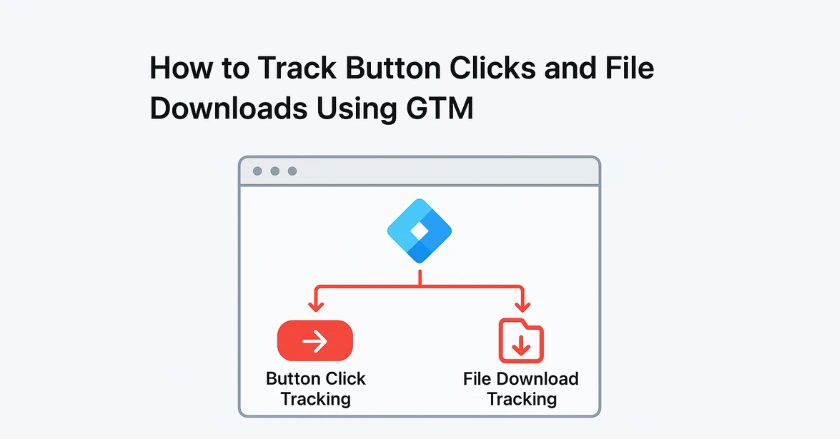
Tracking user actions on your website is easy with Google Tag Manager. Just master its click and download tracking features. A good setup helps you see how users interact with your content. You can track what links they click and which files they download.
This guide shares the steps I used to track hundreds of websites. You’ll learn how to gather accurate data. This data helps improve performance and user experience. Whether you’re a beginner or refining your skills, it has everything you need to get started.
Short Intro
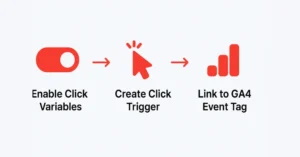
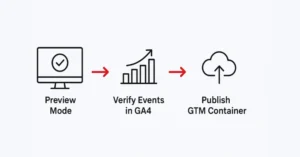
Google Tag Manager makes tracking button clicks and file downloads easy. It uses built-in variables and custom event tags. Enable click variables. Create specific triggers for your target elements. Then, set up GA4 Event Tags to capture user interactions. Test everything in Preview and Debug mode first. This makes sure data collection in Google Analytics 4 is correct before you publish.
Understanding the Basics of Google Tag Manager (GTM)
Google Tag Manager (GTM) simplifies managing tracking codes and measurement scripts. You don’t need to edit the website code. After years of using GTM, I’ve seen how it transforms how businesses track user behaviour. GTM has three main parts:
- Tags send data to platforms such as Google Analytics 4.
- Triggers determine when the tags fire.
- Variables hold dynamic values, like Click URL or Click Text.
This setup makes it easier to track actions. You can easily monitor button clicks and file downloads, unlike traditional methods.
Whether you run a small business or a large enterprise, GTM’s visual interface is a game-changer. You can easily update tracking. Test changes before you publish. This helps you keep measurements consistent across your digital presence.
Prerequisites for Tracking Clicks and Downloads
Ensure your Google Tag Manager container is on every page before you set up click tracking. Place the tracking code in the head section and right after the opening body tag. This ensures optimal performance.
Enabling GTM’s built-in click variables
Navigate to Variables in your GTM workspace and scroll down to Built-in Variables. Click Configure to access the complete list of available options. For comprehensive click tracking, I recommend enabling these essential variables:
- Click Element
- Click Classes
- Click ID
- Click URL
- Click Text
- Page URL
These variables collect data on user interactions. They form the base for your tracking triggers and tags.
Understanding Tags, Triggers, and Variables
Variables store dynamic information that changes based on user actions. When a button is clicked, GTM records details. It captures the CSS classes, ID attributes, and nearby Text.
Triggers specify the exact conditions that initiate tracking, and you can configure them for various user actions. For example, track clicks on the Add To Cart button, PDF downloads, or outbound links. Do this based on what you need to measure.
Tags send the collected data to your chosen analytics platform. GA4 Event Tags track user interactions well. You can also use custom HTML tags for special tracking needs.
Setting Up Click Tracking in GTM
To track button clicks effectively, you need a clear plan. First, identify the buttons you want to track. Then, set up the right triggers for each one.
Identifying Button Click Types
Start by categorising the different button interactions you want to measure. Common examples include:
- Add To Cart buttons on e-commerce sites
- Newsletter signup forms
- Contact form submissions
- Menu link clicks
- Social media sharing buttons
Each button type may need different trigger conditions. This depends on the HTML element’s structure and the content around it.
Creating Tags for Button Click Tracking
Navigate to Tags in your GTM workspace and click New to create your first button tracking tag. Choose GA4 Event Tag for your tag type. Then, type a clear event name, such as “button_click” or “add_to_cart.”
Configure your Measurement ID to match your Google Analytics 4 property. Add relevant event parameters to capture additional context about each click interaction. I usually add custom settings for where the button goes, the page section, and the user’s journey stage.
Utilizing Triggers for Button Clicks
Create a new trigger and select Click – All Elements as your trigger type. GTM’s Link Click Listener automatically tracks all clickable elements on your pages.
Define your trigger conditions using the built-in click variables. Use Click Classes with “cta-button” or set Click Text to “Learn More” to track specific buttons.” These conditions ensure your tag fires only for relevant user interactions.
Configuring for Specific Button Clicks
Advanced button tracking often requires more precise trigger conditions. Use regular expressions for flexible matching. This is useful for dynamic content and different button variations.
Consider creating separate triggers for different button categories. This method organizes data better in Google Analytics. It also helps you analyze user behaviour patterns on your site more easily.
Setting Up File Download Tracking in GTM
File download tracking shows you when users download content like PDFs, documents, or media files.
Enabling GA4’s Enhanced Measurements
Google Analytics 4’s Enhanced Measurement automatically tracks certain file downloads, while GTM offers greater control and customization options.Enhanced Measurement is great for basic PDF downloads. However, it might not catch custom file types or specific tracking needs.
For comprehensive download tracking, I recommend using GTM’s custom configuration alongside Enhanced Measurement. This two-part method helps you track all important download events. It also keeps your data consistent.
Creating Specific Event Tags for Downloads
Create a new GA4 Event Tag specifically for download tracking. Use “file_download” as your event name. This follows GA4’s standard naming rules. This uniformity simplifies the analysis of your data and facilitates comparisons with other websites.
Add custom event parameters to capture additional download context:
- file_extension: PDF, DOC, ZIP, etc.
- file_name: The actual filename
- download_location: Which page section contained the link
- document_title: Descriptive name for the content
These parameters show which content types and locations get the most user engagement.
Testing Your Configuration
Testing helps avoid data quality problems. It also ensures your tracking performs well in different situations and user actions.
Using Google Analytics 4 for Verification
Open your Google Analytics 4 Real-Time report while testing your tracking setup. This report tracks events in real time. You can check if clicks and downloads work as they should.
Test interactions on your website. Watch for related events in real-time data. Check the event parameters to make sure they match the expected values for each user interaction.
Testing in GTM’s Preview Mode
Google Tag Manager’s Preview and Debug mode shows how tags fire. It gives you clear insights into their behaviour. Turn on preview mode. Then, go to your website. You can see which tags activate for each click.
The debug interface displays trigger conditions, variable values, and errors. These issues can stop accurate tracking. I often use this mode to troubleshoot tricky tracking issues or check new setups.
Check that your triggers activate only for intended elements. Broad trigger conditions can cause data noise. However, very specific ones may overlook key user interactions.
How Can You Optimise GTM Performance?
Regularly Update Your Setup
Website changes can break existing tracking configurations. Review your GTM setup every three months. This helps keep it accurate as your site changes.
Watch for new button types, updated CSS classes, or changes in page layouts. These may need trigger adjustments. Proactive maintenance prevents data gaps and ensures consistent measurement over time.
Monitoring Data Quality and Consistency
Set baseline metrics for your button clicks and file downloads. This helps you spot unusual patterns or tracking problems. Sudden spikes or drops in interaction data usually signal configuration issues. They often don’t reflect real changes in user behaviour.Use Google Analytics 4’s custom dimensions and parameters. They help you make detailed reports about user interactions. Your tracking shows how users fully engage with your content. If you’re on Shopify, you can also try the Wixpa Google Tag Manager app to simplify GTM setup.
Troubleshooting Common GTM Tracking Issues
Even experienced GTM users encounter tracking challenges. Here are solutions to the most frequent problems I’ve resolved:
Check Click Events: Make sure your Click Element variables are on. Also, ensure your triggers are not too strict. Test with broader conditions first, then refine based on the captured data.
Duplicate Events: Multiple triggers might be firing for the same user action. Review your trigger conditions for overlaps and consolidate where appropriate.
Check your variable settings: Make sure they capture the right HTML attributes or content. Use preview mode to inspect actual variable values during testing.
Auto-event listeners sometimes conflict with existing JavaScript on your site. If you see performance issues, try using specific trigger conditions. This can help reduce the monitoring scope.
Final Thoughts and Next Steps
Tracking clicks and downloads in Google Tag Manager gives useful insights. This helps you understand user behaviour and how well your content performs. This guide has helped me implement reliable tracking for websites of all types.
Begin with simple click tracking for important actions. As you get used to GTM, you can add more advanced measurements. Accurate tracking is essential. It boosts user experience and increases conversion rates based on data.
Test your tracking setup in a controlled space first. This way, you can make sure it works right. It will help you avoid disrupting your analytics when you go live.
FAQs
How do I track button clicks using Google Tag Manager?
To track button clicks in GTM, you need to:
- Enable Click Variables in GTM (e.g., Click Text, Click Classes, Click ID).
- Create a Click Trigger that fires when the specific button is clicked.
- Create a Tag (e.g., Google Analytics 4 Event) linked to that trigger.
- Publish the container. You can view button click events in your analytics platform. This works without needing to add code to your site.
How can I track file downloads in Google Tag Manager?
Tracking file downloads involves:
- Enabling Click URL in GTM variables.
- Setting up a Link Click Trigger that activates when the Click URL ends with your file type (e.g., .pdf, .docx, .zip).
- Linking that trigger to an event tag in GA4 or another analytics tool. This method shows how often users download resources. This gives you useful insights into engagement.
What types of files can I track with GTM?
You can track almost any downloadable file, including .pdf, .docx, .pptx, .zip, .xls, .csv, and image files like .jpg or .png. Customise your Link Click Trigger with various file extensions. This helps GTM track all key download events.
Why use GTM instead of coding to track clicks and downloads?
With GTM, you can add, change, or remove tracking. You won’t have to touch your website’s source code. It saves time, prevents developer delays, and lowers the chances of breaking your site. GTM centralises all tracking rules in one dashboard. This makes management easier.