

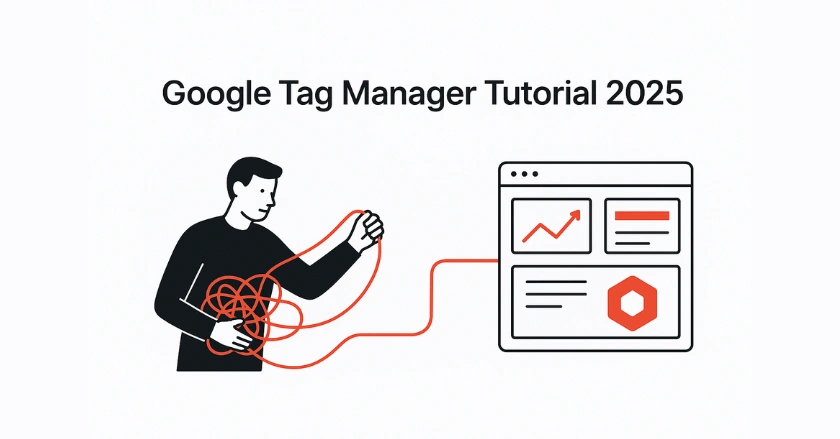
Are you tangled in tracking codes and struggling to manage your website’s analytics? This Google Tag Manager tutorial will take you from beginner to expert. You’ll learn to track your website step-by-step and discover how to improve your workflow. You can also collect better data without always changing your site’s code.
Short Intro
Google Tag Manager (GTM) is a free tool. It makes it easy to manage and deploy marketing and analytics tags. These tags are snippets of code used on your website or mobile app. Instead of hard-coding each tracking code, you use GTM’s interface to add, edit, and disable tags. This tutorial shows you how to set up your account. You’ll learn about core components like tags, triggers, and variables. Then, you’ll implement your first tracking codes.
Why Do You Need Google Tag Manager?
If you’ve ever managed a website, you know how crucial it is to understand user behavior. You need to know which pages are popular, where visitors are coming from, and what actions they take. This is where tracking codes, or “tags,” come in. But as your marketing efforts grow, so does the complexity of managing these tags.

The Pain Points of Traditional Tracking
Without a tool like GTM, you need to edit your website’s source code. This is necessary to add tracking for Google Analytics, Google Ads, or a Facebook Pixel. This process is slow, prone to errors, and often requires assistance from a developer. It creates a bottleneck that can delay important marketing campaigns and data collection.
What Exactly is Google Tag Manager?
Google Tag Manager is a free tool. It connects your website to different tracking tools. You install a single GTM container code snippet on your site. You can then add, update, and manage all your marketing tags from the GTM user interface. This means you won’t need to touch the website code again.
What are the Key Benefits of GTM?
Using Google Tag Manager has big benefits. This is especially true for freelancers and small business owners. They need to stay flexible.
- Speed and Agility: Deploy new tracking tags in minutes, not days. You can quickly launch new campaigns and start collecting data immediately.
- Centralized Management: See and control all your tracking codes, such as Google Analytics 4 and remarketing tags, from a single dashboard.
- Reduced Errors: GTM’s Preview Mode lets you test your tags first. This way, you can check if your tracking works and make sure it doesn’t break your site.
- Empowerment: Marketers can handle their own tags. This means they don’t need to rely on developers all the time. As a result, tech teams can focus on other important tasks.
How GTM Revolutionizes Your Website Tracking
GTM puts you in control. It allows you to set up complex event tracking, like form submissions or video plays, with just a few clicks. It also works well with its “secret sauce,” the data layer. This captures custom data for deeper analysis. This gives insights that are hard to get with manual tagging.
Who is This Tutorial For?
This GTM tutorial is designed for anyone new to the world of tag management. If you’re a freelancer, blogger, or digital marketing trainee, you’re in the right spot to boost your skills. No prior coding knowledge is required to get started.
Understanding the Core Components of GTM
To master Google Tag Manager, start with its three main parts: Tags, Triggers, and Variables. Think of them as the “what,” “when,” and “how” of tracking.
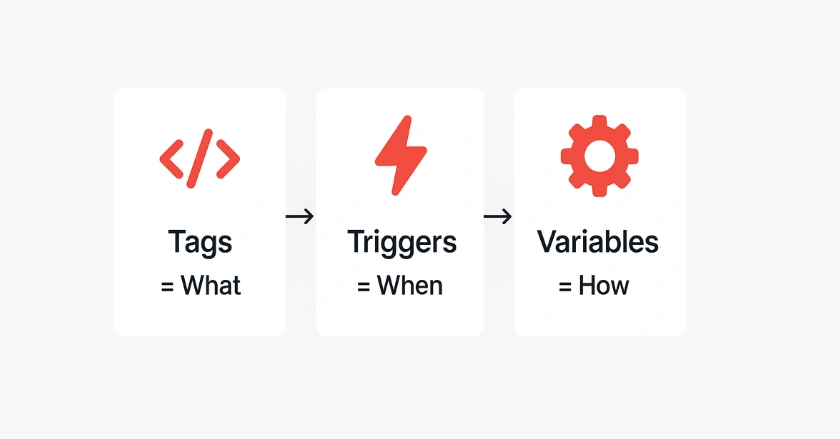
- Tags: Tracking Snippets are small code pieces from tools such as Google Analytics, Google Ads, and Facebook Pixel. They tell GTM what to do, such as send a page view to Google Analytics or track a conversion for a Google Ads campaign. GTM has many built-in tag templates to make this process easy.
- Triggers: When Your Tags Fire Triggers are the rules that tell your tags when to fire. For example, you can set a trigger to fire a tag on a specific page view, when a user clicks a button, or after they submit a form. A tag won’t do anything until a trigger tells it to.
- Variables: The Dynamic Data Your Tags Need. Variables are placeholders for changing values. These can include a product name, price, or URL.
They provide the dynamic information your tags and triggers need to function. You can use a variable to store your Google Analytics 4 Measurement ID. This way, you won’t need to type it each time you create a GA4 tag. - The Data Layer: The Secret Sauce for Advanced Tracking
The data layer is a JavaScript object. It stores all the info you want to send from your site to Google Tag Manager.
GTM tracks many things automatically. However, the data layer lets you push custom info. You can add user properties or e-commerce details for better event tracking.
Getting Started with Your GTM Account
Ready to dive in? Start by creating your Google Tag Manager account. Then, set up your first container. This process is straightforward and only takes a few minutes.
- Creating Your Google Tag Manager Account. First, visit the Google Tag Manager website. Then, sign in using your Google Account.
Click “Create Account,” add your company name, and select your country. This creates the overarching account for your business. - Understanding Your GTM Container Next, you’ll set up a container. A container holds all the tags, triggers, and variables for your website or mobile app. Name your container after your website (e.g., “mywebsite.com“) and select “Web” as the target platform.
- Finding Your GTM Container Code Snippet
After you create the container, GTM gives you two code snippets. These are the only pieces of code you’ll need to install on your website. You can easily find this Google Tag Manager code snippet by clicking your GTM ID at the top of the user interface.
How to Install GTM on a Website?
Installing the Google Tag Manager container code is a one-time setup. Once it’s done, you can manage everything else from the GTM interface. Here are the most common methods.
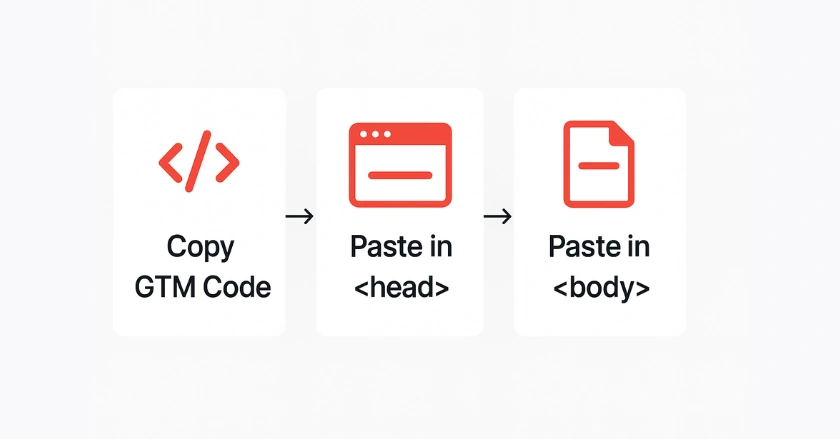
- Method 1: Direct Code Installation
The most fundamental way is to copy the two provided code snippets and paste them directly into your website’s source code. The first snippet goes as high as possible in the section of every page, and the second goes immediately after the opening tag. - Method 2: Using CMS Plugins
If your site is built on WordPress, you can easily set it up using a plugin. Plugins like “GTM4WP” let you paste your container ID, and the plugin handles placing the code snippets correctly. - Method 3: Working with Developers
If you aren’t comfortable editing code, simply email the code snippets to your web developer with clear instructions on where to place them. This method is widely used and considered a completely valid approach to managing the installation. - Verifying Your GTM Installation
After installation, use the Google Tag Assistant Legacy extension for Chrome to verify that your GTM container is firing correctly. You can also use GTM’s built-in Preview Mode to confirm it’s working before you publish any changes.
Navigating the Google Tag Manager Interface
The GTM user interface is where you’ll spend most of your time. It’s well-organized, but it helps to know what each section does before you start creating tags.
- GTM Dashboard Overview: The main dashboard shows a clear view of your container. It includes recent changes, published container versions, and the workspace status.
- Key Sections: Tags, Triggers, Variables, Versions. The left menu is your command center. Here you can access dedicated sections to create and manage your tags, triggers, and variables. The “Versions” tab keeps a history of all your published changes, so you can revert to a previous state if needed.
- Understanding the GTM Workspace: A workspace is a draft area. You can make changes here without impacting the live version of your container. This allows multiple team members to work on different tasks simultaneously without conflict.
Your First GTM Implementations
Let’s put theory into practice. These guides will help you set up two key tracking tools for your website.
1. Implementing Google Analytics 4 (GA4) Tracking
Most people begin by adding Google Analytics through GTM. Set up a new tag named ‘Google Analytics: GA4 Configuration’ and insert your GA4 Measurement ID. Set the trigger to fire on “All Pages.” This will start collecting basic page view data.
2. Basic Event Tracking: Page Views
The GA4 configuration tag tracks page views automatically. Each time the tag fires, it sends a page_view event to your Google Analytics 4 property. This event is the foundation of your website analytics.
3. Tracking Outbound Link Clicks
Want to know when users click on links leading away from your site? Set up a trigger called “Click – Just Links.” Make sure it only activates when the “Click URL” doesn’t include your website’s domain. Then, create a GA4 event tag that uses this trigger to send an “outbound_click” event.
Pro Tips for GTM Success
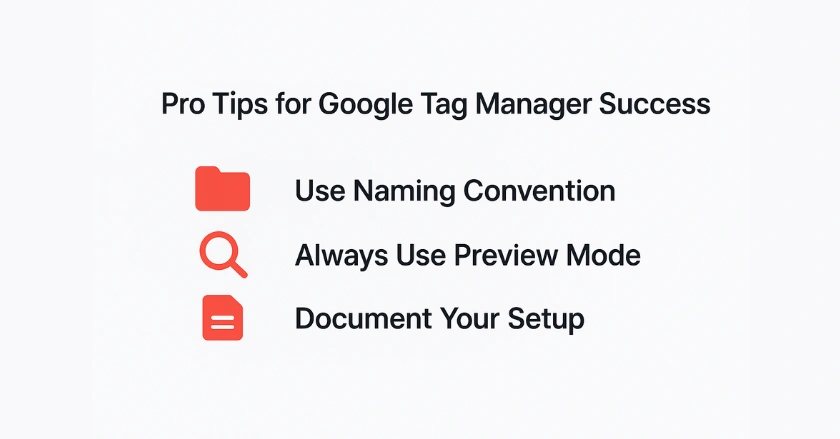
Use a Naming Convention
Organize your GTM container. Use a clear naming system for tags, triggers, and variables. For example, name them like this: “GA4 – Event – Outbound Click.”
Always Use Preview Mode
Test all changes in Preview Mode before publishing. This ensures they work correctly and won’t cause any issues.
Document Your Setup
Create a simple document or spreadsheet. Explain what each tag does. This will be invaluable as your GTM setup grows more complex.
Final Thoughts
Congratulations! You now have a solid foundation for using Google Tag Manager. GTM is a powerful tool. It might look overwhelming in the beginning, but stay calm. With some practice, you’ll manage your website’s tracking like a pro. Begin with these basics. Stay curious. You’ll reveal a new level of data-driven marketing.
FAQs
1. What is Google Tag Manager (GTM) and why should I use it?
Google Tag Manager (GTM) is a free tool by Google that lets you manage all your website tracking codes (tags) in one place without editing your site’s code. It makes tracking faster, reduces errors, and empowers marketers to add tags like Google Analytics, Ads, or Facebook Pixel easily.
2. How do I set up Google Tag Manager on my website?
To set up Google Tag Manager, create an account at tagmanager.google.com, add a container, and place the code snippets in your site’s and . After setup, you can add, test, and publish tags from the GTM dashboard without editing site code.
3. Can I use Google Tag Manager for e-commerce tracking?
Yes, GTM is widely used in e-commerce. It allows you to track user actions like product views, add-to-cart events, purchases, and more. By connecting GTM with Google Analytics 4 or other marketing platforms, you can measure conversions, optimize ads, and improve customer insights without manually adding multiple scripts.
4. How long does it take to set up Google Analytics with GTM?
Setting up Google Analytics with GTM usually takes less than 15 minutes. After creating a GA4 Configuration Tag in GTM and adding your Measurement ID, you can track page views instantly. More advanced tracking, like events or e-commerce, may take extra time depending on your goals.
5. How long does it take to set up Google Analytics with GTM?
Setting up Google Analytics with Google Tag Manager takes less than an hour. Create a GA4 tag, add the measurement ID, and publish the container. For faster setup, tools like Wixpa Tag Manager can automate integration, especially for Shopify and e-commerce stores.