Google Tag Manager (GTM) changed how businesses track website performance and user behavior. GTM lets you manage all your marketing and analytics tags in one place. This means you can avoid the manual addition of tracking codes to every page of your website. This guide will help you set up Google Tag Manager the right way. You’ll start by creating your first account. Then, you’ll learn advanced tracking techniques.
This guide is for marketing pros and business owners. It helps you Set Up Google Tag Manager with efficiency. You’ll understand your website’s performance better. This helps you avoid common mistakes that hurt your data accuracy.
Quick Summary
- Core Concepts: Tags collect data, Triggers decide when they fire, Variables make tags dynamic.
- Setup Steps: Create a GTM account → Add a container → Install code on your site or CMS (WordPress, Shopify, Squarespace).
- Essential Tags: GA4 for analytics, Meta Pixel for ads, plus custom events for conversions.
- Testing & Debugging: Use Preview Mode, version control, and browser tools to ensure accurate tracking.
- Advanced Techniques: Cross-domain tracking, data layers, conversion tracking, and server-side tagging for better privacy and performance.
- Maintenance: Perform audits, troubleshoot misfired tags, and keep naming conventions organized.
Start simple (page views, basic tags), then scale into advanced setups.
Accurate, well-maintained GTM configurations lead to smarter marketing decisions and stronger business growth.
Understanding Google Tag Manager Basics

Google Tag Manager is a tag management system. It allows you to update measurement codes and tags on your website or mobile app in a short amount of time. Think of it as a container that holds all your tracking codes in one place, making them easier to manage and deploy.
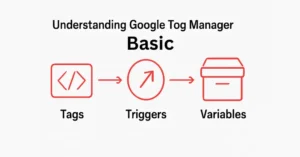
Key Terminology: Tags, Triggers, and Variables
Before you begin the setup, know these three key components that make GTM work:
Tags are small code snippets. They gather data and share it with third parties. This includes Google Analytics, Facebook Pixel, and other marketing tools. These can be used to track things like page views, button clicks, form submissions, or purchases.
Triggers define when tags should fire. They outline the conditions for a tag to run. This can happen when a user loads a specific page, clicks a button, or submits a form.
Variables act like labeled containers that hold values GTM uses in tags and triggers. They can capture information like page URLs, click text, form data, or custom values you define. Variables make your tags dynamic and reusable across different scenarios.
Advantages of Using Google Tag Manager
GTM offers several compelling benefits over traditional hardcoded tracking implementations. Speed and flexibility offer the biggest benefits. It’s easy to add, update, or remove tags whenever you need. This way, you don’t need to wait for developers or site updates.
The system boosts data accuracy. It has built-in error checking and preview modes. These features let you test tags before they go live. This lowers the chance of broken tracking or wrong data collection. Such issues often happen with manual code setups.
Additionally, GTM provides better organization and collaboration features. Many team members can work in the same container. Version control and workspace features track changes, so you can roll them back if needed.
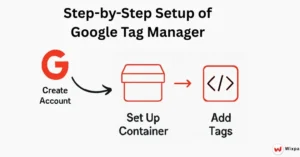
The first step in using Google Tag Manager is to create an account. Then, set up Google Tag Manager by creating your first container. The process is simple, and setting things up properly now will save you time and headaches down the road.
Creating a GTM account
Go to tagmanager.google.com and sign in using your Google account. Click “Create Account.” Then, enter your account name and choose your country. Pick an account name that reflects your organization. This name will be the main label for all your containers.
The account name must be clear and professional. Many groups use their company name or a related version that fits their team. A single account can hold multiple containers. So, consider how your organization might use GTM for different properties.
Setting Up a New Container
Once you create your account, the system will ask you to set up Google Tag manager with your first container. The container name should provide a clear identification of the website or app it serves. Many businesses use their domain names. Some also choose simple labels like “Company Website” or “E-commerce Store.” Choose the right container type:
- Web for websites
- IOS for Apple Apps
- Android for Google Apps
- Server for server-side setups
For most users starting out, the web is the correct choice. The type of container you choose determines which templates and options you’ll have available. Select based on your needs.
Once you create GTM, it gives you installation code. The code comes in two parts: a script tag that goes in the head section and a noscript tag that should be placed right after the opening body tag.
Installing Google Tag Manager

Proper installation is critical for GTM’s proper functioning. The two-part code structure helps track data, even if JavaScript is off in browsers. This is rare now, but still useful.
Installation on Different Platforms
For standard HTML sites, copy the head script. Then, paste it near the top of the head section on each page you want to track. Place the body script right after the opening body tag. Both snippets must be present on every page for comprehensive tracking.
Many developers use template files or header/footer includes. This helps keep things consistent across all pages. This approach reduces the risk of missing pages and makes future updates easier.
Integrating with Content Management Systems
Most popular CMS platforms offer plugins or built-in tools that make installing GTM easier. WordPress users can install plugins like “Google Tag Manager for WordPress.” They can add the code to the files of their theme without any intermediary steps.
Shopify users can add GTM code using the theme editor. Squarespace offers built-in GTM integration in the connected accounts section. Always follow the best practices for each platform. This helps ensure proper setup and prevents issues with current features.
Organizing and Managing Tags
After installing GTM, you can add tags. This helps track various parts of your website’s performance. Start with basic tracking. Then, add more advanced tags over time. This is the best method.
Installing Google Analytics 4 tags
Google Analytics 4 (GA4) is the current standard for website analytics. To set up GA4 tracking, create a new tag. Then, choose “Google Analytics: GA4 Configuration” from the tag templates.
Get your GA4 Measurement ID from your Google Analytics property settings. Create a trigger that fires on “All Pages” to ensure that the system tracks every page view. This simple setup will track key metrics such as page views, sessions, and user behavior.
If you have an online store, think about adding enhanced e-commerce tracking. You can also set up custom events for actions that matter to your business goals.
Setting Up Meta Pixel Tags
Facebook’s Meta Pixel is essential for social media advertising and retargeting campaigns. Create a new tag using the “Custom HTML” template and paste your Meta Pixel code. Set the trigger to fire on all pages for base tracking.
You can add extra tags for specific events. These include purchases, sign-ups, or content views. These special tags boost your Facebook ads and give you better data on performance.
Real-Time Data Viewing and Management
GTM’s interface provides real-time visibility into tag firing and data collection. The “Tags” section displays all set tags, how often they fire, and any error messages. This info is key for maintaining high data quality and for spotting issues without delay when you set up Google Tag Manager for your website.
Use the “Versions” tab to track changes over time. Create restore points before making major changes. This version control system is crucial for fixing issues or undoing bad changes after you set up Google Tag Manager.
Debugging and Testing
It’s important to test your GTM implementation carefully before making any changes. This helps keep your data accurate and prevents tracking issues.
Using GTM’s Preview Mode for testing
Preview mode is GTM’s testing space. It shows how tags will work. You can check this without changing live data. Click “Preview” in your workspace to enter this mode, then navigate to your website in a new tab.
The preview panel shows which tags fired, which didn’t fire, and why. This real-time feedback helps you spot configuration issues. It also allows you to verify the correct functioning of triggers. Test various scenarios, including different page types, user interactions, and conversion paths.
Common Debugging Practices
Systematic testing should cover all major user journeys and tag configurations.
Checklist:
- Track page views on various templates.
- Check form submissions
- Count button clicks
- Log custom events you’ve set up.
Browser developer tools provide more debugging capabilities. The Network tab displays tag requests sent to different platforms. The Console tab shows JavaScript errors that could disrupt tag execution.
Document any issues you discover and their resolutions. This documentation is useful for troubleshooting later. It also helps team members grasp your GTM setup.
Advanced GTM Techniques
As you grow your GTM skills, you can use advanced tracking techniques. These will give you better insights into user behavior and business performance.
Cross-Domain Tracking
Businesses with many domains need cross-domain tracking to understand the complete user journey. To set this up, configure your GA4 tag with extra domains. Ensure that we identify users across properties in a reliable manner.
Create a variable with all your domains. Then, use this variable in your GA4 configuration tag. Cross-domain tracking stops inflated session counts. It also provides accurate attribution for user journeys across many domains.
Utilizing the Data Layer
The data layer is like a bridge that helps your website share important information with Google Tag Manager. Developers can add custom data to the data layer. This data is then available for tags and triggers in GTM. Common data layer implementations include:
- Enhanced ecommerce data
- User information
- Custom event parameters
This structured approach provides more reliable data than scraping information from page elements.
Conversion Tracking Setup
Accurate conversion tracking requires careful planning and implementation. Define your conversion events with precision. Create tags and triggers that capture them accurately.
E-commerce conversions usually include pages for completing purchases or particular user actions. Lead generation sites might track form submissions, phone calls, or content downloads. Every type of conversion needs its own specific tag setup and proper testing to make sure it works correctly.
Implementing Server-Side Tagging
With server-side GTM, tags run on your server instead of in your visitors’ browsers. This gives you better control over data privacy and boosts page performance. This advanced technique needs a Google Cloud Platform setup and technical work. But, it provides big benefits for organizations that care about privacy.
Server-side tagging collects data with greater reliability. It skips problems caused by ad blockers and browser limits. These often impact client-side tags.
Maintaining Your GTM Configuration
Regular maintenance keeps your GTM setup accurate. This is important as your website and business needs change.
Conducting Periodic Audits
Schedule regular GTM audits to identify unused tags, outdated configurations, and optimization opportunities. Check the tag firing patterns. Look for JavaScript errors. Ensure that data flows accurately to all connected platforms.
Quarterly audits work for most organizations. But, high-traffic sites or those with frequent changes may need monthly reviews.
Troubleshooting Common Issues

Common GTM problems are:
- Tags aren’t firing because they’re linked to the wrong triggers.
- Data quality issues from misconfigured variables.
- Too many tags loading causes performance problems.
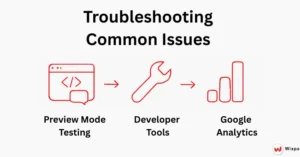
Create a step-by-step troubleshooting method. Start with preview mode testing. Then, use browser developer tools for analysis. Finally, check the results on platforms like Google Analytics.
Best Practices for Configuration Optimization
Keep your tags, triggers, and variables organized by using clear and consistent names. Choose descriptive names that clearly express the purpose and scope of each element. This consistency becomes crucial as your GTM container grows in complexity.
Organize related elements using folders and consistent naming patterns. Note your setup with descriptions and versions. This helps team members grasp your configuration logic.
Taking Your GTM Skills to the Next Level
Google Tag Manager simplifies website tracking. It also transforms tracking into a strong marketing tool. This guide walks you through creating a data collection system that can scale as your business grows.
Begin with simple page view tracking. Then, add advanced measurements as your confidence and needs grow. Accurate data is worth more than a lot of data. So, focus on proper implementation rather than adding features.
Think about getting Google Tag Manager certification. It can boost your skills and help you keep up with updates. The skills you build will grow more valuable. This is because businesses depend more on data for their decisions.
Your GTM journey starts with a good setup. But the real value comes from regular optimization and smart use of the insights you collect.
FAQ
Google Tag Manager (GTM) is a free tool that lets you add and manage tracking codes without editing website code. You can track page views, button clicks, form submissions, or purchases by setting up tags, triggers, and variables, all from one centralized dashboard.
To set up GTM, create an account at tagmanager.google.com and generate a container. Install the two code snippets, one in the head and one after the opening body tag, on every page. Platforms like Wixpa.com provide step-by-step guidance to ensure smooth setup and integration.
GTM lets marketers manage tracking without relying on developers. It improves speed, data accuracy, and collaboration while offering version control. Many Shopify store owners use apps such as Wixpa Tag Manager to simplify installation and unlock advanced features without needing technical knowledge.
Basic GTM tasks, like adding GA4 or Meta Pixel, require no coding, thanks to built-in templates. More advanced setups, such as using custom events or the data layer, may need some JavaScript. Still, most businesses can run effective tracking with little to no coding skills.
The best practice is to use one GTM account with separate containers for each domain. For cross-domain tracking, configure GA4 tags to unify sessions and user behavior. This ensures accurate attribution, prevents inflated session counts, and provides a clear view of customer journeys.


