

If you run an online store, you’ve probably heard of Google Shopping, a powerful tool that allows your products to gain visibility right at the top of search results. For any e-commerce beginner, tapping into this resource is essential for driving traffic, increasing conversions, and growing your business.
But to use Google Shopping Ads, there’s one critical step you need to get right first: creating a Google Shopping Feed.
This post will guide you through everything you need to know—what a Google Shopping Feed is, why it’s crucial, and a simple step-by-step guide to creating one. Plus, you’ll learn a few optimization tips and common pitfalls to avoid.
What is a Google Shopping Feed?
Imagine a digital catalog that contains all the information Google needs to showcase your products in Shopping Ads. That’s your Google Shopping Feed. It’s essentially a file or database with structured data on your products, which you upload to Google via the Google Merchant Center. Google uses this data to create Shopping Ads or Shopping Listings, like the ones you see when you search for a product online.
Key Attributes of a Product Feed for Google Shopping
When creating your Google products feed, you’ll need to include specific attributes for each product. These are the essential details Google uses to identify and present your items to potential customers. Here are some key attributes to include:
- ID: A unique identifier for each product.
- Title: The name or title of your product. Keep it descriptive and concise.
- Description: A short overview of what your product offers.
- Link: The URL of the product page on your website.
- Image Link: A high-quality image that represents your product.
- Price: The accurate and up-to-date price of your product.
- Availability: Whether the item is in stock, out of stock, or on preorder.
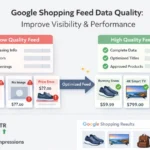
Adding these attributes accurately is critical for ensuring your products rank well in Google Shopping results.
Step-by-Step Guide to Creating a Google Shopping Feed
Now that you know the basics, here’s a beginner-friendly guide to creating your very own Google Shopping product feed.
Step 1: Set Up a Google Merchant Center Account
The Google Merchant Center is the platform where you’ll manage your feed. Here’s how to set it up:
- Go to Google Merchant Center.
- Sign in with a Google Account.
- Enter your business information, including name, country, and time zone.
- Verify and claim your website’s domain following Google’s instructions.
Voilà! You’re ready for the next step.
Step 2: Choose Your Feed Creation Method
There are several ways to create a feed for Google Shopping, depending on your needs and resources:
- Manually: Use a spreadsheet and upload it as a
.txtor.xmlfile. - Google Sheets Add-on: Google offers an add-on to help create and upload your feed.
- eCommerce Platforms: Platforms like Shopify often have apps (like a Wixpa Google Shopping Feed App) that automate feed creation.
- Third-Party Tools: Examples include DataFeedWatch or ProductsUp for advanced feed management.
Step 3: Optimize Your Product Data
Optimized data helps Google understand your products and makes your ads more appealing to shoppers. Focus on:
- Clear, keyword-rich product titles and descriptions.
- Accurate and detailed attributes, such as price and availability.
- High-quality images to improve click-through rates.
Step 4: Upload Your Feed to the Google Merchant Center
Log in to the Merchant Center and upload your Google Shopping Feed:
- Go to “Products” > “Feeds” > “+” to add a new feed.
- Select your target country and language.
- Choose a method of uploading (e.g., Google Sheets or scheduled fetch).
- Submit your feed and check for errors.
Step 5: Link Google Merchant Center to Google Ads
To start running campaigns, sync your Merchant Center account with Google Ads:
- Go to “Settings” in the Merchant Center.
- Navigate to “Linked Accounts” and connect your Google Ads account.
- Create a shopping campaign in Google Ads, targeting the products from your newly created feed.
Your Google Shopping product feed is now ready for action!
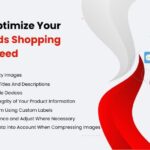
Tips for Optimizing Your Google Shopping Feed
Creating a good feed is only step one. Optimizing it can make all the difference in performance. Here’s how:
- Use High-Quality Images
Clear, bright photos are more likely to attract clicks.
- Write Compelling Titles and Descriptions
Include relevant keywords and make the benefits of your products stand out.
- Keep Your Product Data Up-to-Date
Always ensure prices, stock availability, and other details are accurate.
- Use Google Product Categories
Assign products to the correct categories to improve visibility.
- Add Product Identifiers
Provide GTINs, MPNs, or brand names when applicable.
Common Mistakes to Avoid
Even if you’ve followed all the steps, some mistakes could hinder the success of your Google Shopping Feed:
- Incomplete or Inaccurate Product Data
Missing key information may disqualify your products from being displayed.
- Not Updating Your Feed Regularly
Failing to keep your feed current with stock or price changes can frustrate customers and violate Google policies.
- Ignoring Google’s Policies
Review and comply with Google’s Shopping Ads policies to avoid penalties or suspension.
Elevate Your eCommerce Strategy with Google Shopping
A well-crafted and optimized Google Shopping Feed is essential for any e-commerce business. By following the steps and tips outlined in this guide, you’ll be setting your products up for success in the competitive digital marketplace. Start taking action today, get your feed ready, upload it, and watch your online store gain the visibility it deserves.
Want to simplify the process even further? Many platforms, like Shopify, offer integrations with Google Shopping apps like Wixpa Google Shopping Feed to automate and streamline your efforts.