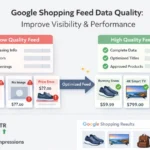

Setting up Google Tag Manager for event tracking might seem tough, but it’s a great way to see how users engage with your website. I’ve tracked hundreds of campaigns. I’ve learned that good event tracking turns raw data into useful insights. These insights can lead to real business results.
This guide covers all you need for Google Tag Manager event tracking. You’ll learn from basic setup to advanced custom events. You’ll find useful techniques for marketers, SEOs, and bloggers. These tips help you make data-driven choices.
Short Summary
Google Tag Manager helps you track user actions on your website. You can do this without changing any code. Set up your GTM container. Connect it to Google Analytics 4. Then, create triggers for user actions. Finally, configure event tags to capture important data. This process turns guesswork into clear insights. These insights boost your marketing performance and enhance user experience.
What Makes Google Tag Manager Essential for Event Tracking?
Google Tag Manager changes how we track user behavior. You no longer need developers for every new interaction you want to check. GTM lets you manage tracking codes from one central place. You don’t need to hardcode tracking pixels into your website. It offers a visual interface for easy handling.
The real power emerges when you connect GTM to Google Analytics 4. This combination shows how users interact with your site. It reveals what content they like and where potential customers leave the conversion funnel.
Understanding Events in Google Analytics 4 (GA4)
GA4 treats everything as an event, which differs significantly from Universal Analytics. Page views, clicks, form submissions, and custom interactions are all events. Each has its own specific parameters. This event-driven model gives better data on user engagement. It also allows for more flexible reporting options.
Understanding these event structures is key for modern tracking. They are the base of all your analytics insights. When you set up event tracking correctly, you can measure micro-conversions. These are often missed by regular page view tracking.
Why Event Tracking Transforms User Analysis
Event tracking reveals the story behind your website traffic. You can track more than just visits to your pricing page. Now, you can see which features users explored, how long they compared options, and where they chose to request a demo or make a purchase.
This granular data becomes especially valuable for conversion tracking and user experience optimization. You’ll learn which buttons get the most clicks. You’ll see which content keeps visitors engaged. Also, you’ll discover which navigation paths lead to successful conversions.
How do GTM components work together?
Google Tag Manager operates through four core elements that function in harmony. Knowing these parts helps you create dependable tracking systems that gather accurate data all the time.
Tags define what information you want to collect and where to send it. Your GA4 Event Tag tells Google Analytics to track a user action. It also collects details about that interaction.
Triggers specify exactly when your tags should activate. A link click trigger goes off when someone clicks specific links. A form submission trigger activates when visitors fill out your contact form.
Variables pull live data from your website. This makes your tracking clearer and more helpful. Variables can do more than record “button clicked.” They can capture the exact button text and the page where it happened.
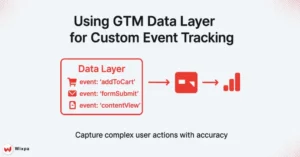
The Data Layer serves as the communication bridge between your website and Google Tag Manager. It stores organized data. This allows for advanced custom event tracking. It’s especially useful for complex user actions that standard triggers miss.
What’s the Initial Setup Process for GTM and GA4?
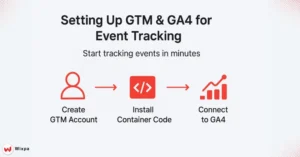
To set up your foundational tracking, you need to connect Google Tag Manager to Google Analytics 4 in a precise manner. This initial configuration determines the quality and reliability of all future tracking implementations.
Creating Your Google Tag Manager Account
Start by visiting the Google Tag Manager website and creating a new account for your organization. Pick a clear container name for your website. Then, choose “Web” as your platform to track website interactions.
GTM generates a unique container code that you will need to install on every page of your website. This container snippet enables all your future tracking without requiring more code changes for each new event you want to check.
Installing the Container Code Correctly
You must place the two parts of the container snippet in specific locations on your website. The first script goes in the <head> section of your HTML, while the second <noscript> part goes immediately after the opening <body> tag.
Many content management systems and website builders have fields for Google Tag Manager setup. This ensures the code loads properly on every page and maintains consistent tracking across your entire site.
Configuring Your GA4 Connection
Inside your GTM workspace, create a new GA4 Configuration Tag using your GA4 Measurement ID from Google Analytics. Set this tag to trigger on “All Pages” so it establishes the connection between GTM and GA4 for every visitor session.
This tag tracks basic page views automatically. It also sets up the foundation for any extra event tracking you will add. Test this connection using GTM’s Preview mode before publishing to ensure data flows correctly to your GA4 property.
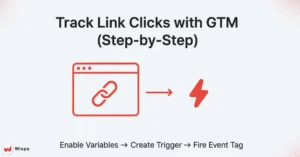
How to Track Link Clicks Step by Step?
Link click tracking shows which external resources your visitors value. It also helps you see how they navigate your site. This fundamental tracking technique forms the basis for more advanced user interaction monitoring.
Step 1: Enable Built-In Click Variables
Navigate to Variables in your GTM workspace and scroll down to the Built-in Variables section. Enable the “Click Element,” “Click Text,” and “Click URL” features. They automatically gather key details whenever someone clicks on your site.
These built-in click variables provide the data foundation for your link tracking triggers and tags. They eliminate the need to manually configure variable collection for standard click interactions.
Step 2: Create a Precise Link Click Trigger
Build a new trigger and select “Link Click” as the trigger type. Set the trigger to activate on “Some Link Clicks,” not on all clicks. Then, add conditions to specify which links to track.
For outbound links, use the condition “Click URL does not contain your-domain.com” to track when visitors leave your site. For tracking internal navigation, list specific page URLs or link text that shows key user engagement.
Step 3: Configure Your GA4 Event Tag
Create a GA4 Event Tag. Use a clear event name, such as “outbound_link_click” or “internal_navigation.” Then, attach your link click trigger to this tag. It should fire whenever the specified link interactions happen.
Add event parameters to capture more context. Use link_url, link_text, and source_page. These details help us understand each click interaction better. These parameters show you what content gets the most engagement. They also reveal which external resources your audience likes best.
Advanced Link Tracking Strategies
Think about tracking different types of links. This will help you organize your analytics data better. Each event—newsletter signups, social media links, and resource downloads—needs its own name and settings. This makes reporting clearer.
You can also track link clicks on specific pages only by adding more trigger conditions. This method avoids data overload. It also highlights the key user interactions that support your business goals.
How to Track Button Clicks with Precision?
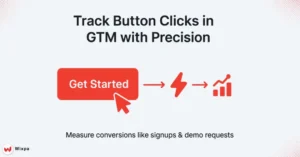
Button click tracking helps you see how users engage with key elements. This includes “Add to Cart” buttons and newsletter signup forms. This tracking provides direct insight into user intent and conversion funnel performance.
Step 1: Create a comprehensive button-click trigger.
Use the “All Elements” click trigger type instead of link clicks for buttons, since many buttons don’t use traditional anchor tags. Set conditions using button text, CSS classes, or element IDs. This helps you target specific buttons with precision.
For example, use conditions like “Click Text equals ‘Get Started'” or “Click Classes contains ‘cta-button’.” This helps you track key conversion buttons without logging every small click.
Step 2: Configure Detailed Event Tags
Name your button click events with clear descriptions to distinguish them in your analytics reports. Events like “cta_button_click,” “newsletter_signup_attempt,” or “demo_request_click” clearly indicate the user’s intent and action.
Include relevant event parameters that provide context about the button interaction. Button text, page location, and user session info show which buttons work best. They also help identify where you can improve.
Step 3: Install Dynamic Event Parameters
Use GTM variables to automatically capture button text, page URLs, and other dynamic information. This method scales well. You can add new buttons easily, so there’s no need to update each tag configuration by hand.
Track button position and nearby content. This helps you see which placement strategies drive the most engagement. This data is key to improving your conversion elements. It’s based on real user behavior patterns.
How Does Data Layer Enable Custom Event Tracking?
The Data Layer is the strongest feature of Google Tag Manager. It enables advanced tracking setups. It lets developers send custom event data to GTM. This helps track complex user interactions that standard triggers miss.
Understanding Data Layer Structure
Think of the Data Layer as a neat box. It holds information that your website uses for tracking. When a user completes a buy, submits a form, or reaches a milestone in your application, your developer can push relevant data to this layer.
This data is quickly available to your GTM triggers and tags. It helps you track complex user journeys and specific business metrics that basic click tracking can’t provide.
Implementing Custom Event Data
Work with your development team to identify key user interactions that deserve custom tracking.
Data Layer implementation helps with:
- E-commerce transactions
- Form completions
- Content engagement milestones
- Application-specific actions
These actions all see improvements with a Data Layer in place.
Each custom event should include relevant parameters that provide context about the user’s action. Product details for purchases, form field info for submissions, and content categories for events help build complete user behavior profiles.
Creating Custom Event Triggers in GTM
After adding custom event data to your Data Layer, set up triggers in GTM. These triggers will activate when the events happen. Use “Custom Event” trigger types and specify the exact event names that your website pushes to the Data Layer.
Custom event triggers provide better tracking than generic click or form triggers. They capture complex interactions more reliably. They provide precise control over when and how your tags fire.
Pro Tips for Reliable Event Tracking
I’ve tracked events for many websites and found ways to boost data accuracy and reliability. These techniques help you avoid common pitfalls that can compromise your analytics insights.
Always Test in Preview Mode
GTM’s Preview mode becomes your best friend for validating tracking implementations. This feature shows which tags trigger for each user action. It helps you spot configuration issues before they impact your live data.
Test every trigger condition thoroughly, especially for complex button and form tracking. Preview mode shows if your triggers fire too often, overlook key interactions, or pick up unwanted elements.
Organize Your Tracking Structure
Keep naming consistent for your events, triggers, and tags. This helps with clarity as your tracking setup expands. Descriptive names, such as “newsletter_signup_form_submit,” help with data analysis. They’re better than generic names like “event1.””
Create folders in GTM to group related tracking elements. Also, document your tracking strategy. This helps team members understand and maintain your setup effectively.
Check data quality regularly.
Set up custom reports in Google Analytics 4 to monitor your event tracking performance. Look for sudden spikes or drops in event volumes that might indicate tracking issues or website changes affecting your implementation.
Regular data audits help you identify when tracking breaks due to website updates, ensuring your analytics remain accurate and actionable for decision-making.
Final Thoughts
Google Tag Manager event tracking transforms how you understand user behavior on your website. With proper implementation, you’ll gain insights that guide content strategy, improve user experience, and increase conversion rates through data-driven optimization.
Start with basic click and form tracking, then gradually expand to custom events as your analytics sophistication grows. Remember that successful event tracking requires ongoing maintenance and regular testing to ensure data accuracy.
The investment you make in proper event tracking setup pays dividends through better business decisions and improved marketing performance. Whether you’re optimizing content for local customers at your neighborhood coffee shop or scaling a global e-commerce platform, reliable event data provides the foundation for sustainable growth.
Take the first step today by setting up your Google Tag Manager account and implementing basic click tracking. Your future self will thank you when you’re making confident decisions based on solid user behavior data.
FAQs
Best way to setup tracking & GTM?
Use Google Tag Manager to replace multiple codes with a single container, simplifying google tag manager event tracking setup.
How to learn GTM conversion tracking setup?
Start with Google’s free resources, then practice creating triggers and tags for conversions in google tag manager event tracking.
How do I hook up existing Google Tags in GTM?
Add your tag in GTM, configure triggers, and publish. This makes managing and scaling google tag manager event tracking easier.
How to create an event to track a button in Google Tag Manager?
Enable click variables, create a trigger, then fire a tag. This ensures accurate google tag manager event tracking for button clicks.
What events make sense to track on a blog using GTM?
Track clicks, scroll depth, and form submissions to improve engagement insights with efficient google tag manager event tracking.