
Google Merchant Center is a free tool that helps businesses boost their online visibility to millions of shoppers across Google platforms like YouTube, Google Images, and Maps. You can easily manage and upload your product information with a merchant account to display when customers search for related items. It enables businesses to reach more customers and drive online and in-store sales.
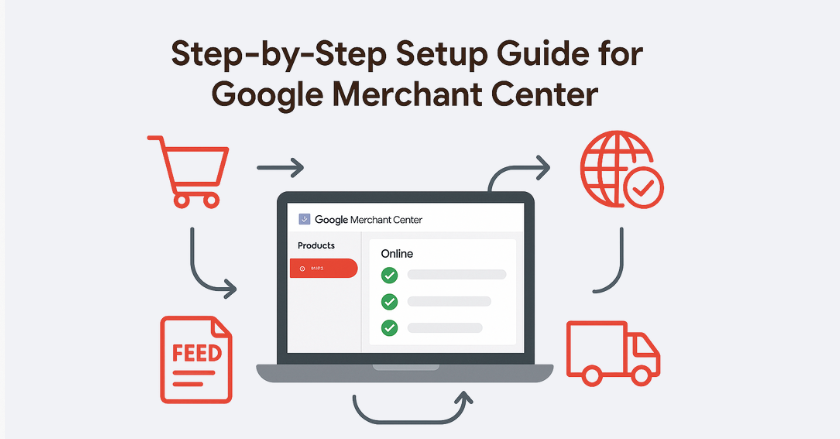
This is a complete guide to setting up your Google Merchant Center so that your products are accurately listed and accessible to a broader audience.
Steps to Create Google Merchant Center
Follow these simple steps to set up your Google Merchant Center account. These steps will help you understand account creation for the latest version of Google Merchant Center Next.
1. Create a Google Merchant Center Account
The first step is to have a GMC account. You can sign up or sign in to your Google Merchant Center account.
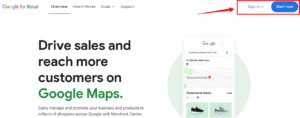
Google Merchant Center Next is the latest version. You can continue to use its older version, which is Google Merchant Center Classic. At the top right of your screen, you have to provide all the business information and the Merchant Center feed ID. There will be a panel on the left side. You’ll provide your data for your online store.
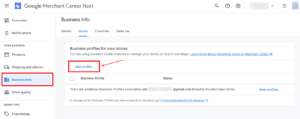
2. Add Business Details and Contact Information
The business information required depends on the type of business you are setting up. Follow Google’s instructions carefully to include all necessary details.
- On the left panel, click ‘Business Info.’
- Click Details > Business details > Edit business details.
- Enter your business name, address, and contact details for verification.
- Add your customer service contact for Shopping ads.

- Create your business store. Click on Store and add a profile.
- Click ‘Countries’ and mark all the countries where you want to sell your product.

3. Verify and Claim your Website
Once the account is created, the next important step is to verify and claim the website. This step is done to ensure that Google recognizes the store as an authentic business. To verify your account, go to the Business Information section, click on Details> Your Online Store> Confirm online store. Enter your website URL and choose a verification method. Google provides multiple verification methods. This includes;
- HTML file upload
- Google Tag Manager
- Google Analytics
- Meta tag verification.
Follow the instructions provided for the selected method. When the verification is complete, click the Claim URL to finalize the process and establish ownership of the website.
Requirements to claim a website
You have to meet the following requirements to claim your website.
- Contact Information Must be Accurate
Add your contact details. These include a contact form, links to your social media profiles, email addresses, and phone numbers. Mention the time when you’ll be available to respond to your customers.
- Give Payment Methods
We recommend you offer at least one conventional payment method. This can be a debit card, invoice, credit card, or cash on delivery.
- Disclose all the Billing Terms and Conditions
Provide all the terms and conditions that are related to your business before and after purchase. This may include payment models and total costs that the user has to pay.
- Provide a Secure Checkout Process
Ensure all payment transactions are secure by using SSL-protected servers with a valid SSL certificate (https://). If you face issues with Shopify SSL pending, resolve them promptly to prevent checkout problems.
- Outline Your Refund Policy
Provide a clear return and refund policy. This policy should explain the procedures, requirements, and timelines for returns and refunds. If you do not accept returns or refunds, clearly state this on your website.
- Complete Checkout Process
Customers should easily add products to their cart and complete the purchase. Provide a smooth and hassle-free checkout experience on your website.
4. Set up Shipping and Sales Tax
Now you can set up shipping and sales tax details. Follow these steps to set up this:
- Go to the Shipping & Returns> Shipping Policies. Click on the Return Policies and provide information.

Add accurate data about your online store and follow the given prompts. You must explain how you’ll handle your return and refund policies. This may be
- What are the conditions of returns and refunds?
- What the user should do to return
- When your customer should expect a refund
- The time during which a customer can return the product
Mention charges, shipping details, and the time to deliver the product. Google will offer a tax configuration based on your business location for sales tax. Google can calculate the sales tax automatically, or you can set it up manually. You have the authority to determine whether shipping and handling fees should be taxed.
Go to Products > Sales Tax
5. Set Up a Google Merchant Center Data Feed
It is an important step to add products to your Google Merchant Center and to make them visible on Google Shopping. You can do this in the following ways
- Connect it to Shopify
- Use Google Sheets
- Add them individually
- Upload a product data feed
- Use an API
Google also offers Automatic Product Submission, which collects product data directly from online stores. This requires structured data, website verification, and permission for Google to extract the information. To avoid errors and ensure approval, you must follow Google’s product data specifications before uploading your products.
Adding Products in Google Merchant Center
There are two methods for adding products in Google Merchant Center
- By manual method
If you have a small number of products, you can add them manually. This is the simplest method. Go to Products > All Products > Add Products in your Google Merchant Center dashboard. Choose the option to add products individually and fill in all the required fields. This includes title, description, price, availability, and image URL.
- By the Product feed method
A Google Merchant Center feed is a structured file containing multiple product listings and their attributes. There are two types of feeds: primary feeds and supplemental feeds.
- Primary Feed
The primary feed is the main data source for your products. If all required details are included in the primary feed and meet Google’s criteria, no additional feeds are necessary.
- To create a primary feed, navigate to Products > All Products > Add Product.
- Select ‘Add Products from a file.’ You can either upload the feed file from your computer or enter a feed URL if the data is hosted online.
- Set up a schedule to allow Google to fetch updates automatically.
- Select the target country and language.
- Choose the Google networks where you want your products to appear.
- Click Continue, enter a name for your feed, and specify how Google should fetch the data. Upload the file and click Create Feed to complete the setup.
- Supplemental Feed
A supplemental feed is used to modify or add additional details to existing product data in a primary feed. This is useful if you want to update specific attributes like sale prices, promotions, or additional product descriptions without altering the main feed.
- Enter a name for the feed
- Choose how Google should fetch the data.
- Provide the necessary details and save the feed.
Integrate Google Merchant Center with Shopify Using Wixpa
Wixpa Google Shopping Feed simplifies product feed management for Shopify users. You can automatically sync product details with Google Merchant Center.
- Installing the app from the Shopify App Store
- Connect your Google Merchant Center account.
Your product categories must align with Google’s taxonomy for better visibility. The app will keep the product feed updated in real time once it’s integrated. Moreover, you can optimise the products according to GMC’s needs within our application for better ranking.
Finalize and Submit the Feed
When you have uploaded the Google Merchant Center data feed, check the Diagnostics section for errors or warnings. Common issues include missing attributes, incorrect pricing formats, or disapproved images. You must fix all these problems to ensure a smooth approval process.
6. Check Google Policies
Carefully go through the Google Ads Policies thoroughly and understand Google’s expectations of merchants. Google set up these policies to provide a reliable and positive experience to your customers. If you follow Google policies, you will be able to provide a nicer shopping experience to your customers. Your products are likely to receive disapproval, misrepresentation, or a ban.
7. Submit Your Merchant Center and Review
When you have created your account and have set up your Google Merchant Center Data Feed, you can set it up for review. There is a high chance that your merchant centers will not disapprove if you go through Google policies thoroughly. When you submit your account, you will be directed to the preview tab. Choose this tab. Google will analyze and approve your account.
Your Google Merchant Center is ready! You can sell your products across your Google Display Network.
Follow Google Policies to Keep Your Account Approved
You have to follow the rules set forth by Google Merchant Center. These rules guarantee a safe advertising environment and a positive consumer experience as they ban harmful products and content.
1. Comply with the Shopping Policies
Your product listing must follow the relevant Shopping policies. Don’t advertise prohibited content such as dangerous products. Inappropriate shopping ads might lead to account suspension. Do not sell restricted items like alcohol, copyrighted content, trademarks, high-fat sugar, salt food, and beverages.
2. Use a Supported Language
When listing products, use a language supported by the Merchant Center. Submit separate product data for each language. Ensure that your product data links to landing pages in the same language. Use the same language for:
- Your website
- The product data you submit
- The language chosen when registering product data
3. Collect User Information Responsibility
Be careful when you collect user information:
- Collect personal data, like credit card numbers, on an SSL-protected page.
- Never sell users’ contact information.
- Do not use personal data or images in ads without consent.
- Your site should not focus on collecting user information.
Only offer free items or incentives in these cases:
- With a product purchase.
- As part of a marketing campaign.
- When you are collecting user data is not the main goal.
4. Promote only Products Available for Direct Purchase
You must have an online store where customers can buy the items you advertise in Shopping. Except in countries that participate in the CSS program, you are not permitted to use shopping to promote affiliate or pay-per-click links to products.
5. Your Data Must Meet the Product Data Specification
You must prepare your product data to match the product data definition when you’re ready to submit your products through the Merchant Center; otherwise, the product may be rejected.
6. Sign in to your GMC Regularly
Keep your Merchant Center account active, and log in at least once every 14 months. Frequent sign-ins assist in guaranteeing that your product data is kept up-to-date and current.
7. AI-Generated Content Disclosure
Google has added structured title [structured_title] and structured description [structured_description] to its product data standard properties for AI-generated content in shopping advertisements and free listings. Therefore, if your product title and description are AI-generated, you need to incorporate these two properties in your product data.
Takeaways
A Google Merchant Center account is your gateway to connect with your customers on the extensive networks of Google. You can set up your account easily and kickstart your sales journey. Therefore, set up your Google Merchant Center Feed carefully and optimize the data feed. This is a great way to enhance your product visibility and create meaningful connections with shoppers globally.
FAQs
1. Is Google Merchant Center Free?
Yes, GMC is free. You can upload and maintain your product data and display your products on Google, all for free with a Google Merchant Center account.
2. Can I have two Google Merchant Accounts?
If you intend to control more than one Merchant Center account (one for each merchant), request to have your new Merchant Center account converted to an advanced account (MCA).
3. What are the requirements for product data feeds in Google Merchant Center?
Your product data feeds must include essential information, which includes product title, ID, image link, price, availability, and link. There are additional attributes like GTIN, brand, and MPN, which may be required depending on the product category.
4. Can I revert to Google Merchant Center Classic?
No, Google has stopped all accounts from reverting to the previous version. The Next version is available to all accounts as of September 2024. The newest version offers a user-friendly interface and advanced functionality, although it may take some time to get used to the latest version.